
Osm Admin: Mass Editing
2 years ago ∙ 2 minutes read
Recently, I implemented mass-editing in Osm Admin. It allows you to view and edit multiple objects in a single operation.
This article describes mass-editing from the user perspective.
Contents:
Usage
Screencast
A video is worth a thousand words:
Selecting Products
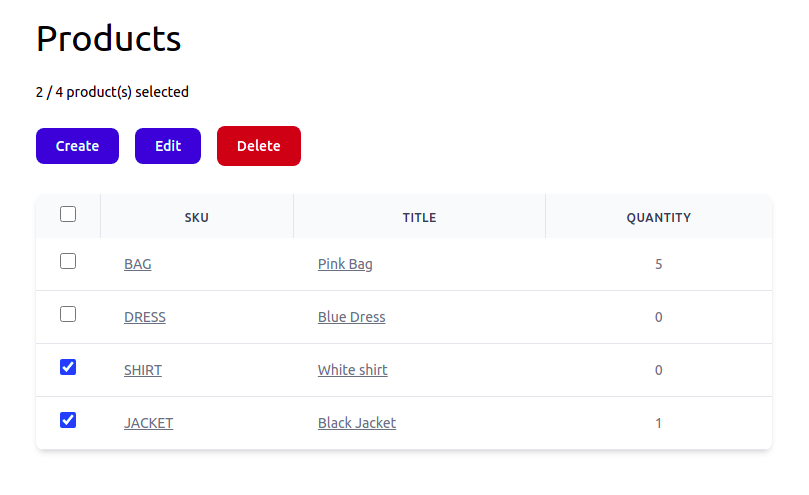
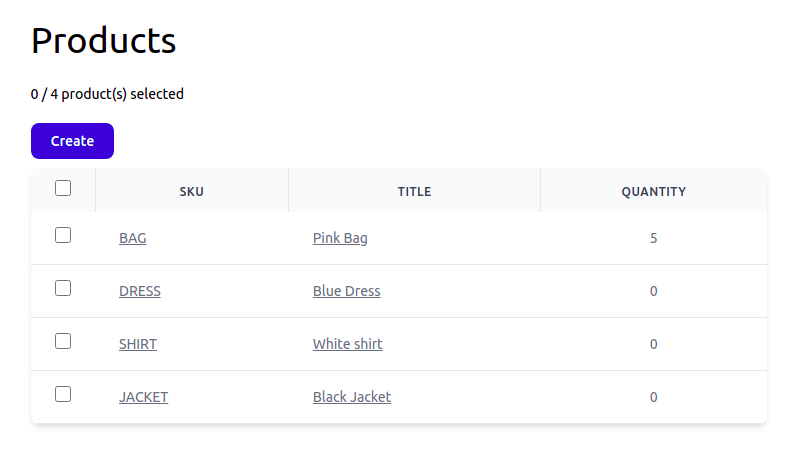
Initially, products are deselected:

As in a typical CRUD application, you can create new products using the Create action, or edit an individual product by clicking on its SKU or title. You can also right-click product's SKU or title, and open it for editing in a new tab.
But that's not mass-editing. In order to mass-edit several products, select them:
 .
.
Alternatively, select all products using the checkbox in the grid header, and then deselect the products you don't want to edit:
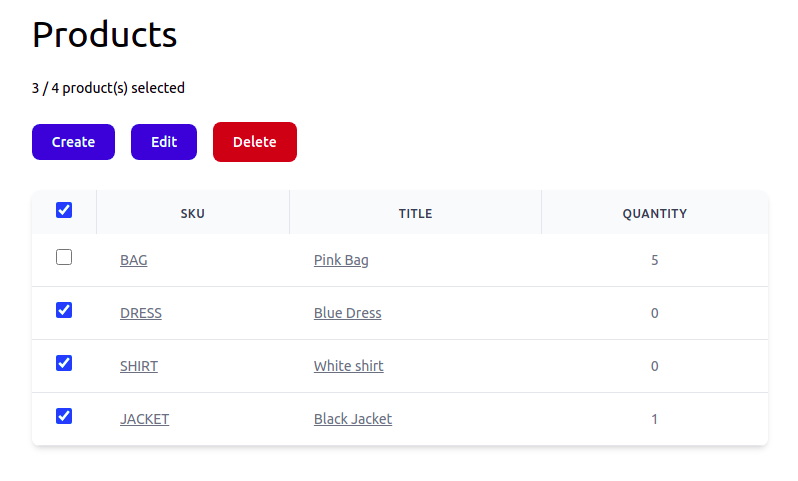
Either way, Edit and Delete actions appears. These actions work with the selected products.
Editing Selected Products
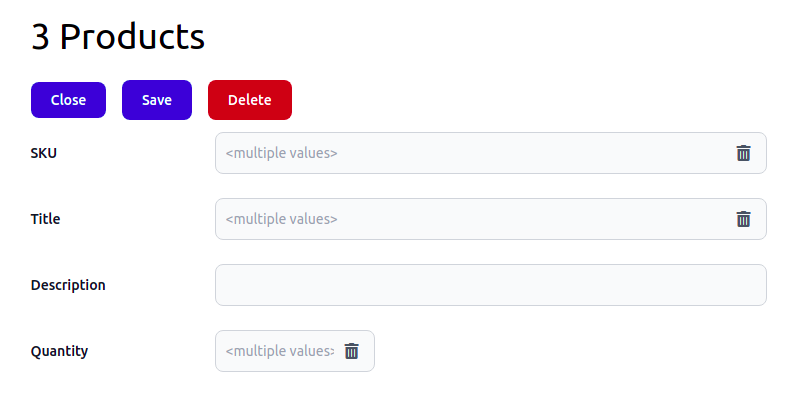
After using the Edit action, the editing form is shown:
Note. You can also right-click the Edit button, and open selected products for editing in a new tab.
Each field shows a property value, if it's the same for all selected products. Otherwise, it shows <multiple values>.
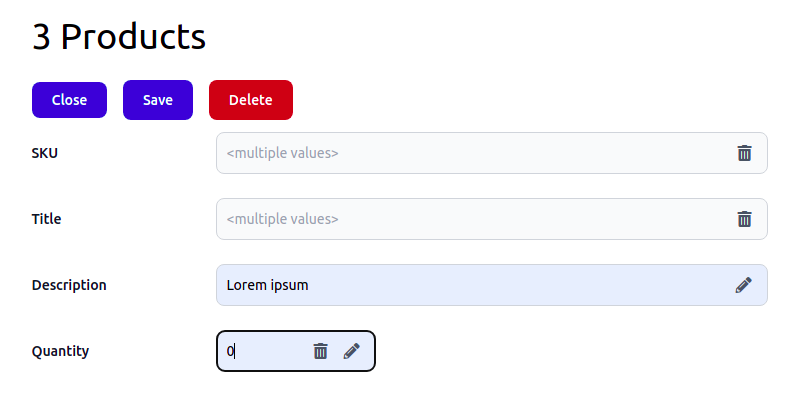
Edit Description and Quantity:
Finally, use the Save action to assign new description and quantity to all selected products. Use Close action to return to the product grid, and make sure that the changes are applied:
Field Actions
You may have noticed two icons that may appear near a field value. Let's call them field action:
- the clear action (recycle bin icon) appears if the property have different values in selected products. Click this action to clear the value in all selected products.
- the reset action (pen icon) indicates that the field is modified. Click this action to restore the initial value.
Deleting Selected Products
Use Delete action, either in the grid, or in the form, to delete all selected products.
Configuration
The best part is that you can create grid-form pairs fairly quickly and in a single file.
To create product properties stored in the database, grid columns and form fields for the above example, create product Product data class as follows:
<?php

namespace ...;

use ...

/**
 * @property string $sku #[
 *      Serialized,
 *      Grid\String_('SKU', edit_link: true),
 *      Form\String_(10, 'SKU'),
 * ]
 * @property string $title #[
 *      Serialized,
 *      Grid\String_('Title', edit_link: true),
 *      Form\String_(20, 'Title'),
 * ]
 * @property ?string $description #[
 *      Serialized,
 *      Grid\String_('Description'),
 *      Form\String_(30, 'Description'),
 * ]
 * @property int $qty #[
 *      Serialized,
 *      Grid\Int_('Quantity'),
 *      Form\Int_(40, 'Quantity'),
 * ]
 */
#[
    Storage\Table('products'),
    Interface_\Table\Admin('/products', 'Product'),
    Grid(['sku', 'title', 'qty']),
]
class Product extends Object_
{
    use Id, SubTypes;
}